To display notifications in MindWare, I have created an alternative version of ChapelR’s excellent Notify macro. The new macro differs from the original in two important ways:
- Close button: In my version, notifications don’t close automatically. Instead, the user has to click a close button. This is to prevent situations where the player doesn’t have enough time to read the information in the notification, especially in cases where the content is crucial to the gameplay or story.
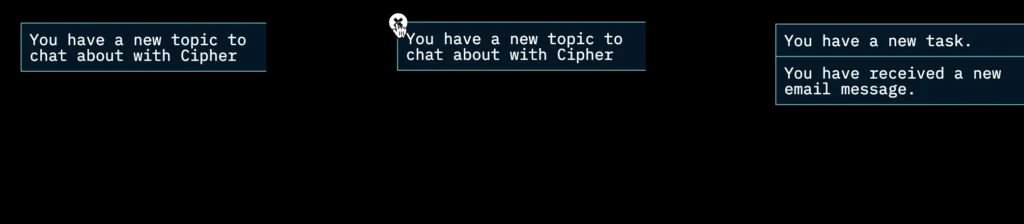
- Multiple notifications: Unlike the original macro, which replaces the existing notification with a new one, my macro supports the display of multiple notifications at once. All displayed notifications can then be dismissed with just one click on the close button.
Here’s an example of the notification macro being used in MindWare (version 0.0.2):
The Code
To use the alternative notification macro in your own Twine/SugarCube 2 project, you need to put this function in a [script] passage, such as StoryJavaScript:
(function () {
    var $notifyContainer = $('<div id="notify-container"></div>').appendTo(document.body); // Notification container

    // Append and set up the close button
    $notifyContainer.append('<button class="notify-container-close"><i class="fas fa-times-circle"></i></button>')
        .find('.notify-container-close').on('click', function () {
            $notifyContainer.find('.notify').remove(); // Remove notifications
            $notifyContainer.removeClass('open'); // Slide out the container
        });

    function addNotification(message, classes) {
        var $notification = $('<div class="notify"></div>')
            .wiki(message)
            .addClass('macro-notify ' + (classes || ''))
            .appendTo($notifyContainer);

        // Delay to ensure CSS transition applies
        setTimeout(function() {
            $notification.addClass('open'); // Trigger the slide-in effect
        }, 50);

        // Show the container with the close button
        $notifyContainer.addClass('open');
    }

    $(document).on(':notify', function (ev) {
        if (ev.message && typeof ev.message === 'string') {
            ev.message.trim();
            var classes = ev.class ? (typeof ev.class === 'string' ? ev.class : ev.class.join(' ')) : '';
            addNotification(ev.message, classes);
        }
    });

    function notify(message, classes) {
        if (typeof message !== 'string') {
            return;
        }

        $(document).trigger({
            type    : ':notify',
            message : message,
            class   : classes || ''
        });
    }

    Macro.add('notify', {
        tags: null,
        handler: function () {
            var msg = this.payload[0].contents,
                classes = this.args.length > 0 ? this.args.flatten().join(' ') : false;
            notify(msg, classes);
        }
    });

    setup.notify = notify;
}());
You also need some CSS styles:
#notify-container {
    position: fixed;
    top: 2em;
    right: -18em;
    width: 16em;
    z-index: 1000;
    background-color: rgba(0, 0, 0, 0.8);
    border: 1px solid #ddd;
    border-radius: 4px;
    box-shadow: 0 0 10px rgba(0, 0, 0, 0.5);
    font-family: Arial, sans-serif;
    transition: right 0.3s;
}

#notify-container.open {
    right: 0em;
}

.notify {
    padding: 0.5em;
    color: #fff;
    border-bottom: 1px solid #ddd;
    opacity: 0;
    transition: opacity 0.3s;
}

.notify.open {
    opacity: 1;
}

.notify:last-child {
    border-bottom: none;
}

.notify-container-close {
    position: absolute;
    top: -20px;
    left: -17px;
    background: transparent;
    opacity: 0;
    border: none;
    color: #fff;
    font-size: 1.2em;
    cursor: pointer;
    transition: opacity 0.3s;
}

#notify-container:hover .notify-container-close {
    opacity: 1;
}

.notify-container-close:hover {
    color: #aaa;
    background: transparent;
}
How to Use the Notification Macro
Here are a few examples to illustrate how you can use the <<notify>> macro in your Twine story:
Basic notification:
<<notify>>notify This is a basic notification!<</notify>>This will display a simple notification with the text “This is a basic notification!”.
Notification with a custom class:
<<notify 'warning'>>Warning: Low Health<</notify>>This will display a notification with the text “Warning: Low Health” and apply the “warning” class for custom styling.
Multiple notifications:
<<notify>>New item acquired: Sword of Destiny<</notify>>
<<notify>>Achievement Unlocked: Sword Master<</notify>>
This example will display two notifications simultaneously: one for acquiring a new item and another for unlocking an achievement.
Notification with a delayed trigger:
<<timed 5s>>
    <<notify>>This message appears after 5 seconds<</notify>>
<</timed>>
This notification will appear 5 seconds after the passage loads.
Combining with story variables:
<<set $health to 50>>
<<if $health < 100>>
    <<notify>>Health is below 100%<</notify>>
<</if>>
This will display a notification if the player’s health is below 100%.
Recent Comments